Tutorial 6: Odds and Ends
In this tutorial, we polish our ODEToolkit skills by learning how to clear graphs, plot orbits, find equilibrium points, label graphs, and to get rid of grid lines. We will also discuss many of the options in the data tab.
Let us start by defining the following system of ODEs:
    x'=y
    y'=-x
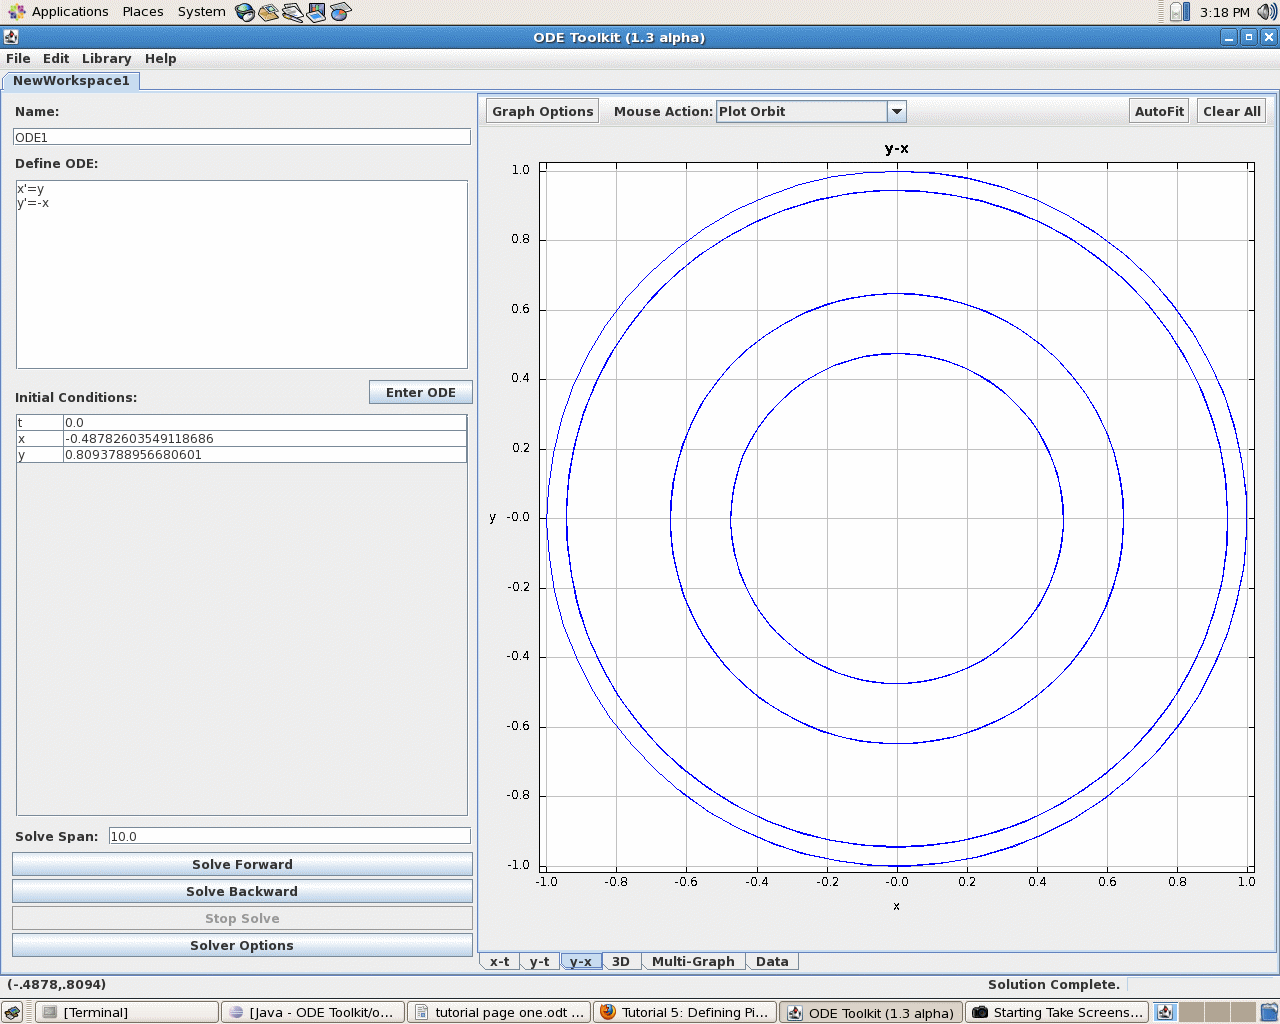
Enter the Initial Conditions t = 0, x = 0, and y = 1. Now click Solve Forward. To get rid of the curve that has been plotted, you can click on the Clear All button in the top right hand corner of the main screen. Now, click on Solve Forward again to make the graph reappear. Now, click on the Graph Options button near the top of the screen and deselect the Grid Line option. Note how the grid lines have disappeared. Turn the grid lines back on and then click on the y-x tab. Change the Mouse Action to plot orbits and click on the graph a few times in different places. Various concentric circles should have been plotted. These are the orbits starting at the locations you clicked on. Your graph should look like this.
Since we are dealing with a planar autonomous system, first plot a direction field to get an idea of where the equilibrium points are, then use the Mouse Action (or right-click anywhere on the graph) to select Find Equilibrium Point and click anywhere on the graph. The equilibrium point should appear as a blue dot at the center of the graph. Now, click on the Graph Options button and then click on the Labels button below. You may now relabel the axes of the graph as well as the title. Now click on the Data tab. The ODEToolkit screen should now look something like the following.
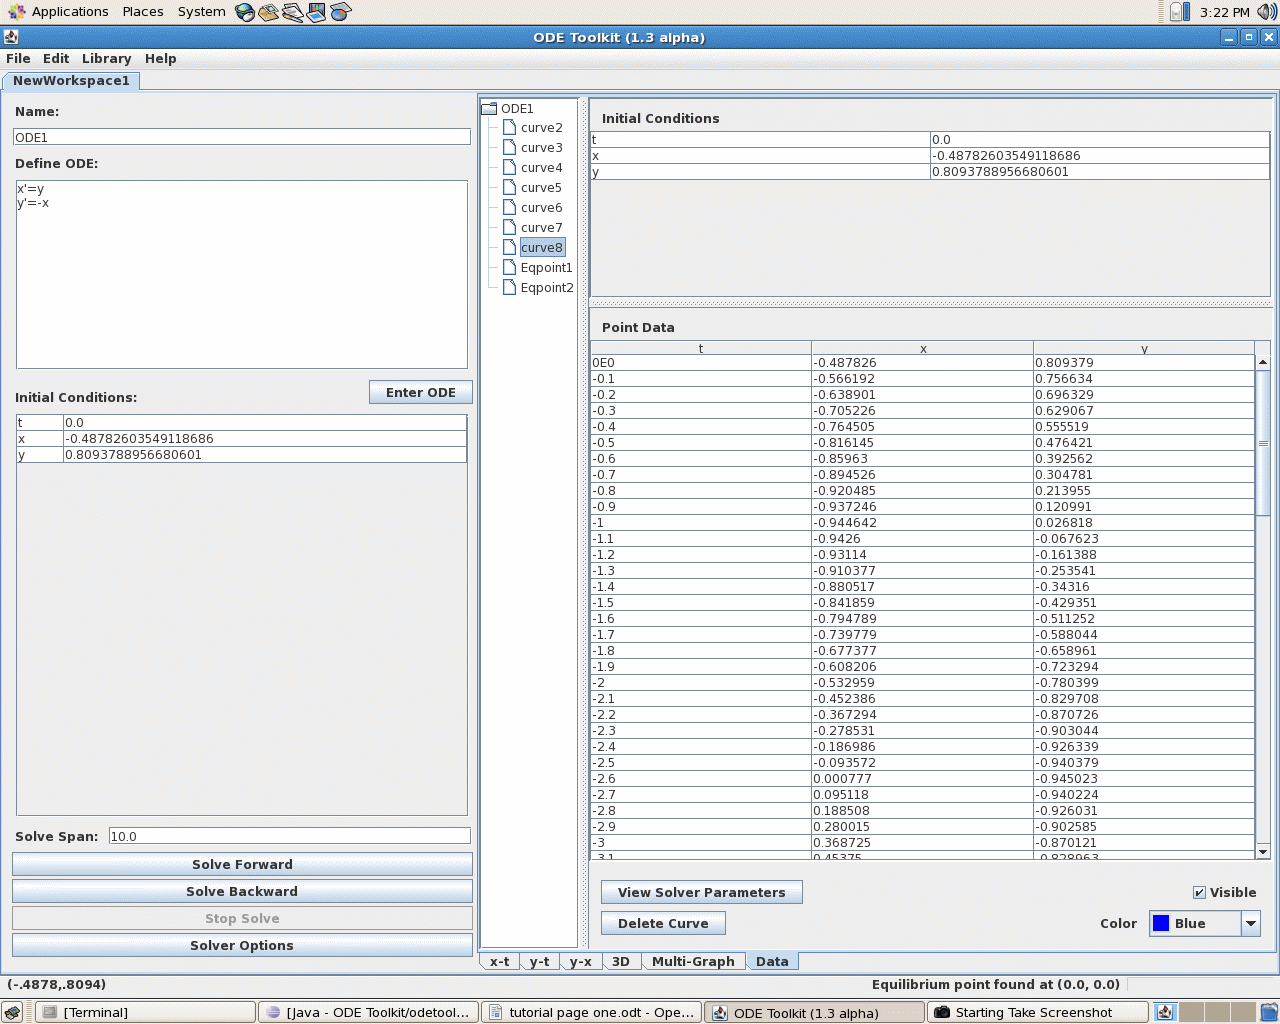
Notice that every orbit is numbered sequentially and that the equilibrium points are individually identified. Click on the most recent curve (orbit) that you plotted. As you can see, the initial conditions for the curve are shown at the top of the screen. Additionally, the data points that were solved for are displayed in columns. You can change the color of individual curves by clicking on the Color drop down menu in the bottom right hand corner of the screen. You can also deselect the Visible option above the Color menu to make curves invisible. If you click on the View Solver Parameters button, you can see which solver and what parameters (minimum/maximum step sizes and error tolerances) were used to generate that curve. You can also delete the curve by clicking on the Delete Curve button right below the View Solver Parameters button. If you are viewing the data for an equilibrium point, you can delete the equilibrium point by clicking on the Delete equilibrium point button in the same location where the Delete Curve button would be if you were viewing the data of a curve.